Survival Canning - DIY Food Canning for Long Term Food Storage
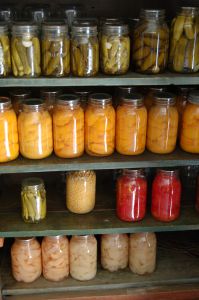
Survival canning is a technique that may take a few tries to master but the effort is worth the reward. During an emergency, grocery store shelves quickly become empty, leaving people with nothing to sustain them for the duration of a disastrous event. However, knowing how to can your own food can reduce emergency related stress and keep you and your family fed and nourished.

Getting Started
If you decide to take on the task of canning your own food, particularly for survival purposes requiring a large quantity and long-term storage, safety and contamination prevention should be your primary concerns. Depending on the type of food you want to can, the altitude at which you live and the process you choose to use, different times, pressures and degrees of heat are necessary.
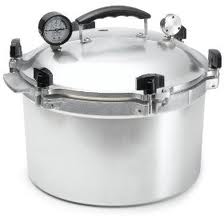
If you do not follow the specific canning guidelines set forth in the USDA's, "Complete Guide to Home Canning," you run the risk of wasting delicious food due to a bacterial invasion so toxic it causes fatal food poisoning. To avoid this problem and ensure you are performing the task of survival canning correctly, use a pressure canner for low-acid foods, or a boiling water canner for high-acid foods.
Pressure Canning Possibilities
The number of foods you might consider pressure canning is virtually limitless, such as:
- Meat
- Fish
- Poultry
- Low-acid vegetables like bean, peas, carrots, corn and potatoes
Some people also can milk, cheese and butter, as well as nuts.
Water-Bath Canning Possibilities
The foods you can water-bath can are those fruits and vegetables high in acid or sugar, such as:
- Tomatoes
- Fruit
- Pickles
- Sauerkraut
- Jams and jellies
Color, Flavor and Freshness
When you take on the task of survival canning, or any canning, you must preserve not just the food but its flavor, color, and freshness. Depending on the food you choose to can and your personal preference, you have a few options for preservation. You may choose to dehydrate, dry, cure, brine, or add ascorbic or citric acid to keep your home made canned goods fresh. It is also important to add an oxygen absorber to the top of the filled container prior to putting on the lid so that no air remains in the food, which would allow bacteria to grow, thereby causing spoilage.
Storage and Duration
Prior to starting the work of survival canning, you need to be sure that you have space for storing a large number of containers. The space used for storage should meet the required temperature conditions for the canned items, each of which should have a label stating what it is, the date it was made and an expiration date.
As a general rule, and when you correctly perform the canning process, the food you package should have a shelf life of as long as five years, but it can also spoil in just three or four days if done improperly.
Spoilage
One of the easiest ways to determine if your canned food is no longer good without even opening it is by looking at the lid. If the lid is no longer depressed, then the seal has been broken — the first sign of spoilage.
When canned food goes bad, the bacteria multiply and cause the contents to expand, often resulting in a popped lid or broken seal. If this does not happen and you proceed to open the can, a foul smell, mold or oozing liquid not natural to the food may be present.
Regardless of the way your food spoils, you do need to discard it carefully and properly. Just as when you canned the food originally, you have to boil the can for 30 minutes to kill any bacteria. It is highly recommended that you wear thick or disposable gloves during this process as contact with the toxins may lead to illness, such as food poisoning.
Canning is a great skill to learn and you can use it to survive on a daily basis, from making a quick dinner after a late night at the office or stocking up on healthy options for a camping trip. No matter what event you need to survive, canned food done right is sure to get you through the hard times.
Return from Survival Canning to DIY Survival Food


New! Comments
Have your say about what you just read! Leave me a comment in the box below.