Homemade Grain Mill
Building a homemade grain mill is not as hard as it initially sounds and most instructions require materials and tools that are cheap and easily purchased at any hardware store. Even the most conservative estimates say that you can put one together for under $100. The one thing that you will find that you need is patience as you will need to be prepared to fit the grinding wheels multiple times to make sure you strike the right balance between not making dust, but still breaking the grains apart.
Key Considerations

If you are thinking about making a homemade grain mill, you will find that you cannot just look at models on line, work out how they are put together and then try making one yourself. Some key features that you will need to make decisions on first before even attempting a prototype include:
- Grinding material – The most traditional method of milling grains is to have two stone circles, which rub against each other. This produces very fine flour, which is suitable for most types of baking. However, the stone on stone process takes a long time, especially with hardier grains such as wheat. In these cases, you may want iron or corrugate aluminum wheels, which will give you a bit more bite. The downside of using metal is you have to clean it and protect it regularly to avoid rust getting into your flour.
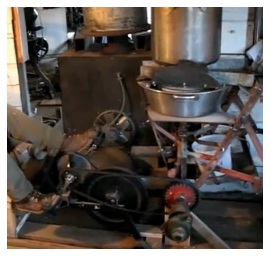
- Power – Homemade does not necessarily have to mean hard labor, though it is worth making a homemade grain mill that will operate without electricity or gas so you are prepared for all scenarios. Hand cranking the mill can take a long time with most mills producing around half a cup of flour per minute. You need to be clever with your power supply and use laws of physics to enhance your muscles. For example, simply attaching a pulley and gear system to the handle will reduce the effort on your arms. Going one step further and attaching the handle to the back gears of a bicycle will help you mill grains as well as keep fit.
- Size – The temptation when building a grain mill is to install a massive hopper capable of holding a dozen pounds of grain to save you the effort of lifting massive sacks. However, big is not always better as big always weighs more, making it harder to move around and harder to take apart and clean. Think about the number of people for whom you need to produce flour, calculate how much you would need in a week and make your mill to that scale. You will be surprised at how small you can make it, with a mill feeding a family of four sitting no higher than the average coffee maker.
The Process
Once you have made these decisions, you are ready to start on your homemade grain mill and the process is fairly simple:
- Start with your two wheels on an axle and support either end so the wheels do not touch the table. Make sure the wheels are close but not touching.
- Attach the hopper to the support so that the thin funnel is directly over where the wheels meet.
- Place another big funnel underneath to catch the milled grains
- Finally, attach a handle to the axle and start milling.
This of course will be a very basic and flimsy homemade grain mill but you can see how it is easy to put one together on a very small budget. You may want to make a few prototypes so you can see potential technical difficulties ahead of time and so that you can experiment with different grinding materials, power supplies and sizes. Building your own grain mill is something you need to do well ahead of the time, so you will be prepared to use it when you really need it.
Return from Homemade Grain Mill to Survival Food


New! Comments
Have your say about what you just read! Leave me a comment in the box below.