Build a Still: Water Distillation and Purification With Common Household Items
Knowing how to build a still is useful information you can apply in various situations. Although most people associate still with the making of illegal liquor, it is also used to purify water. This might not seem like an everyday need for most people, but access to clean water could become a lifesaving issue.
In a post-apocalyptic world, being able to create liquor can be a valuable skill. Not only will it give you the ability to produce a much-desired commodity, which you can use for barter, liquor also has medicinal benefits which makes a still valuable.
If the water supply should ever become unfit for drinking, you will need to find clean water as a matter of survival. A terrorist attack and environmental catastrophes are just two possible occurrences, which could compromise our water supply. In any such case, survival skills of any sort will come in handy, and learning how to build a still could be helpful, not just to your family, but to your entire community.
Getting Started
The main purpose is to separate liquid mixtures, which works on the principle that different compounds heat at various temperatures. If you heat unclean water, it will separate from the contaminant in the form of steam. You can then collect this steam and once you have enough, you will have water that is safe for drinking. The process itself is not complex, and the materials you will need are relatively inexpensive. You can build a still for water purification quickly once you gather all the right components, which are:
- A large, wide mouth container that can hold a smaller container
- A small container
- Some string, or a large rubber band
- A sheet of plastic
- Pebbles or similar objects to use as weights
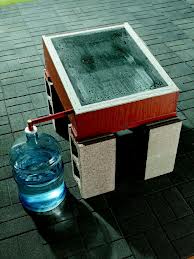
This is a simple set-up to use if you do not have access to a heat source, which is a possibility if the electricity and gas supply are down. The steps to getting pure drinking water are:
- Put water in the large container. Remember the wider it is the better, as this will lead to faster evaporation.
- Put the smaller container inside the larger one. Make sure that the water level is not high enough to push the small container above the top of the large one.
- Cover the large container with the plastic and secure it with the rubber band or string
- Put the pebbles or weights on the plastic directly above the small container. This will create a sag which will help to fill it.
- Put the container out in the sun.
Now all you have to do is wait for the process of evaporation to take place. As the sunlight heats up the water, it will condense on the plastic, and run down to the sagging center. Then it will slowly drip into the small container until you have enough to drink.
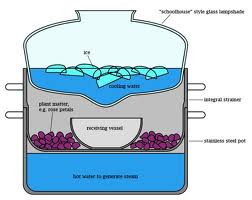
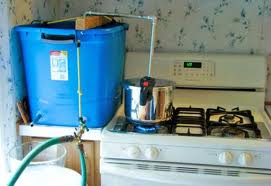
If you are able to use your stove, you can perform a similar procedure, except that you will be using metal containers. Note that stainless steel or copper containers are best if you want to build a still on your stove. In this case, you will need:
- Three metal containers of different sizes, one of which should be a large metal bowl which will serve as a cover for the largest container; the first should be large enough to hold the second container
- Something large enough to weigh down the top container (a rock for example)
- Ice
Steps to Build a Still

1. Put some water in the widest container, then place the second container inside it. The middle container should be heavy enough to sit in the boiling water without moving around.
2. The metal bowl will act as a cover for the widest container, and its shape will allow the steam to drip into the middle container as it condenses. The metal bowl should not come in contact with the catchment container, as this will slow the process down.
3. Place the ice inside the bowl to help speed up condensation as the steam reaches the bottom of the bowl. Depending on how much water you want to purify, you may occasionally need to tilt the bowl to add water to the heating container. You will also need to scoop out water from the bowl and put in fresh ice.
Either of these methods is suitable if you want to build a still for water purification. The first method takes longer, but it is highly practical after a natural disaster or some other cataclysmic event. Be sure that you have clean containers for storing the water once you have accumulated a reasonable amount.
Return from Build a Still to DIY Projects


New! Comments
Have your say about what you just read! Leave me a comment in the box below.